Terraform Container NAS

    Terraform

    Following up from my recent post on a NAS device I had built and used for Linux containers, I had built using a Synology NAS. I have since added more memory to the device, maxing out the memory that the vendor supported 16GB. I have seen unsupported configuration with 20GB on the internet, I have not ventured into this area yet.

    I have also migrated what resources and containers I had in Docker to be managed by Terraform, HashiCorp’s Infrastructure as Code (IaC) tool. Which was a lot of re-creating of what I already had created, Docker volumes, images, and containers.

    I backed up current volume data to restore. Grafana and InfluxDB. Now all Docker resources are done through Terraform configuration and kept in source repository.

    With the secure endpoint setup in the previous post, we can use it to configure docker Terraform provider to help manage your docker resources, keeping the configuration in repository

    terraform {
      # Providers
      required_providers {
        docker = {
          source = "kreuzwerker/docker"
          version = "2.11.0"
        }
      }
    }
    
    # Configure the Docker provider
    provider "docker" {
      host = "tcp://phong.hq.cormier.co:2376"
    
      # Certificates
      cert_path = pathexpand("~/.docker")
    
      registry_auth {
        address = "registry.hub.docker.com"
        username = "rancorm"
        password = "X"
      }
    }
    

    A simple docker resource can be declared by use the resource keyword. This is a simple InfluxDB Telegraf agent container resource.

    This resource entry creates a new Docker container using the latest telegraf image, two file volumes for private CA certificate and telegraf.conf file, and some advanced networking.

    Container resource

    # Enzo - Telegraf Agent
    resource "docker_container" "enzo" {
      image = docker_image.telegraf.latest
      name  = "enzo"
      hostname = "enzo.hq.cormier.co"
    
      # Enable db log driver
      log_driver = "db"
    
      volumes {
        host_path = "/volume1/docker/Cormier_HQ_CA.pem"
        container_path = "/etc/ssl/certs/Cormier_HQ_CA.pem"
        read_only = true
      }
    
      volumes {
        host_path = var.enzo_volume_config
        container_path = "/etc/telegraf/telegraf.conf"
        read_only = true
      }
    
       networks_advanced {
         name = docker_network.lan.name
         ipv4_address = "10.0.80.4"
       }
    }
    

    Image resouce with pull trigger to update to latest version when digest changes.

    # Image
    resource "docker_image" "telegraf" {
      name = data.docker_registry_image.telegraf.name
      pull_triggers = [data.docker_registry_image.telegraf.sha256_digest]
    }
    

    Network for dedicated network

    # Network
    resource "docker_network" "lan" {
      name = "lan"
    
      ipam_config {
        subnet = "10.0.80.0/24"
        gateway = "10.0.80.1"
      }
    }
    

    Docker Hub registry image

    data "docker_registry_image" "telegraf" {
      name = "telegraf:latest"
    }
    

    If you would like to interface with your NAS container endpoint using the docker command line tools. You can set the proper environment variables.

    export DOCKER_HOST=tcp://phong.hq.cormier.co:2376 DOCKER_TLS_VERIFY=1
    

    Quick check of the docker version running on the device should let you know if the communication is working properly.

     ~/Projects/myinfra/ [master*] docker version
    Client: Docker Engine - Community
     Cloud integration: 1.0.9
     Version:           20.10.5
     API version:       1.41
     Go version:        go1.13.15
     Git commit:        55c4c88
     Built:             Tue Mar  2 20:13:00 2021
     OS/Arch:           darwin/amd64
     Context:           default
     Experimental:      true
    

    Run terraform plan to see what changes will be made and terraform apply to make those changes.

    Stay safe!

    Filed in: Terraform, Docker, Linux, Storage
    Reading Time: 3 minute(s)

    A Container NAS named Phong

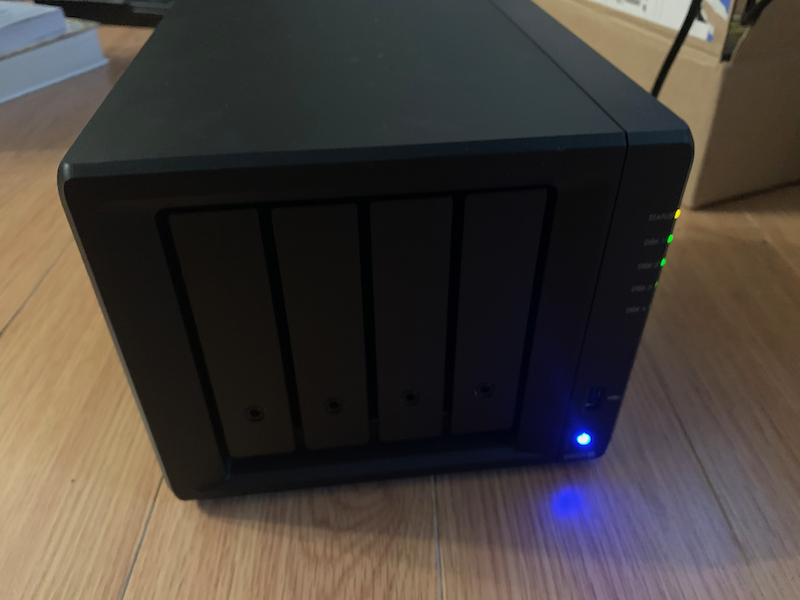
    I recently purchased a Synology DS920+ NAS to use as a host for Linux containers and manage it via the Docker API and Terraform. This post is how I got the device to do exactly that. As to the name of the device, it is named after a ReBoot character.

    DS920+

    Overview

    The Synology DSM Docker interface makes use of the UNIX socket to communicate with Docker daemon (dockerd). So, we will include this in the list of host endpoints when making the modifications, if not we will lose use of the DSM Docker interface.

    Docker Overview

    Enable SSH Access

    To enable SSH Access to the NAS, you can find this under Terminal & SNMP > Enable SSH service. Check the box and click Apply to have the SSH service started.

    SSH Access

    Once enabled, use a SSH client to connect using the password choosen when setting up the NAS device. You remember that don’t you?

     ~/ ssh admin@phong
    admin@phong's password:
    Could not chdir to home directory /var/services/homes/admin: No such file or directory
    admin@phong:/$ uname -a
    Linux phong 4.4.59+ #25426 SMP PREEMPT Mon Dec 14 18:48:52 CST 2020 x86_64 GNU/Linux synology_geminilake_920+
    admin@phong:/$
    

    Docker Daemon Configuration Changes

    Once logged in to the NAS device, proceed to the packages directory (/var/packages) and edit the Docker package Docker/etc/dockerd.json file to get UNIX sockets and a TCP endpoint. You will want to include the UNIX socket entry, as this is what the Docker DSM interface uses, not including it will prevent the showing of statistics, containers, and images. The TCP socket is used by remote Docker clients.

    The package Docker configuration file can be found at /var/packages/Docker/etc/dockerd.json

    {
       "data-root" : "/var/packages/Docker/target/docker",
       "log-driver" : "db",
       "registry-mirrors" : [],
       "storage-driver" : "btrfs",
       "hosts" : [ "unix:///var/run/docker.sock", "tcp://0.0.0.0:2375" ]
    }
    

    This configuration is insecure, it allows any client over a plaintext connection, a clear no-no today. Continue on how to secure the endpoint.

    Endpoint Security

    Beware that the default setup provides un-encrypted and un-authenticated direct access to the Docker API, which is just like having root - and should be secured either using the built in HTTPS encrypted socket, or by putting a secure web proxy in front of it.

    The parameters of dockerd to use TLS, you will need the CA, docker certificate (I use the default Synology certificate), and certificate private key.

    Note: I have internal CA that I used to issue certificate to my NAS device. This is a simple CA service running on OPNsense device.

    ...
          --tls                Use TLS; implied by --tlsverify
          --tlscacert string   Trust certs signed only by this CA (default "/root/.docker/ca.pem")
          --tlscert string     Path to TLS certificate file (default "/root/.docker/cert.pem")
          --tlskey string      Path to TLS key file (default "/root/.docker/key.pem")
          --tlsverify          Use TLS and verify the remote
    ...
    

    Synology DSM stores certificates at this path

    root@phong:/# ls /usr/syno/etc/certificate/system/default/
    cert.pem  chain.pem  fullchain.pem  privkey.pem
    root@phong:/# openssl x509 -in /usr/syno/etc/certificate/system/default/cert.pem -text
    

    Example dockerd.json configuration that will use the default Synology certificate and chain in DSM.

    {
       "data-root" : "/var/packages/Docker/target/docker",
       "log-driver" : "db",
       "registry-mirrors" : [],
       "storage-driver" : "btrfs",
       "hosts" : [
          "unix:///var/run/docker.sock",
    	    "tcp://0.0.0.0:2376"
       ],
       "tlsverify" : true,
       "tlscacert" : "/usr/syno/etc/certificate/system/default/chain.pem",
       "tlscert" : "/usr/syno/etc/certificate/system/default/cert.pem",
       "tlskey" : "/usr/syno/etc/certificate/system/default/privkey.pem"
    }
    

    If you want to only allow clients with issued certifcates to connect, set the tlsverify to true. Note, you should remove any entry in hosts to ports 2375 as this will prevent the docker daemon from starting.

     ~/ docker --tlsverify --tlscacert=ca.pem --tlscert=cert.pem --tlskey=key.pem -H=phong.cormier.local:2376 version
    

    In my case I copy the certificates (ca,cert,key) to ~/.docker/ for easying the use on the command line and keyboards :)

     ~/ mkdir -pv ~/.docker
     ~/ cp -v {ca,cert,key}.pem ~/.docker
     ~/ export DOCKER_HOST=tcp://phong.cormier.local:2376 DOCKER_TLS_VERIFY=1
    

    If you don’t do this or your situation calls for a different CA certificate, you can use the tlscacert argument.

     ~/ docker --tls image ls 
    REPOSITORY             TAG       IMAGE ID       CREATED        SIZE
    nginx                  latest    35c43ace9216   3 days ago     133MB
    grafana/grafana        latest    db33d19bd973   3 days ago     198MB
    amazon/aws-cli         latest    caf8d46b3369   4 days ago     294MB
    postgis/postgis        latest    563a1a69fd0d   5 days ago     491MB
    gitlab/gitlab-runner   latest    e297d453ec30   4 weeks ago    513MB
    microsoft/azure-cli    latest    8bcd2e2ef062   4 months ago   711MB
    

    This is a more secure setup. Secure traffic in transit and authenticate clients with certificates.

    Docker Command Examples

    Some basic commands to run, attach, and exec on containers using Docker API endpoint. For example, to list containers.

    You can pass the endpoint information on the command using -H parameter, but the docker command also honours the environment variable DOCKER_HOST.

     ~/ export DOCKER_HOST="tcp://192.168.0.10:2375"
    

    Or if you are connecting to secure endpoint, use FQDN/hostname…

     ~/ export DOCKER_HOST="tcp://phong.cormier.local:2375"
    

    Now you can use docker commands as you would if docker was running locally.

     ~/ docker container ls
    CONTAINER ID   IMAGE                        COMMAND             CREATED        STATUS          PORTS     NAMES
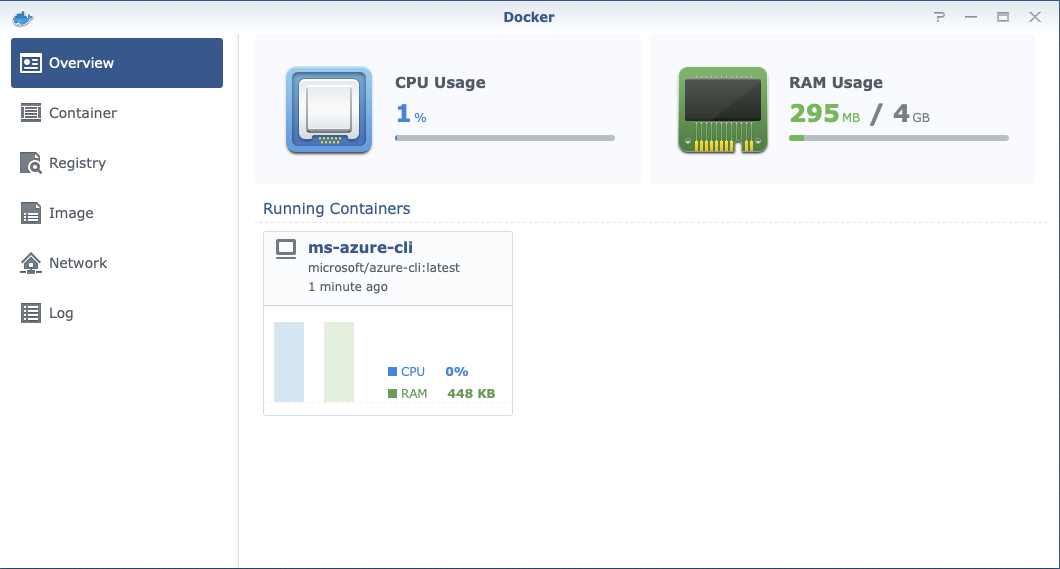
    9c1be7f52ef3   microsoft/azure-cli:latest   "/bin/sh -c bash"   17 hours ago   Up 26 minutes             ms-azure-cli
     ~/
    

    Run a container and execute a given command

     ~/ docker run amazon/aws-cli:latest --version
    aws-cli/2.1.27 Python/3.7.3 Linux/4.4.59+ docker/x86_64.amzn.2 prompt/off
     ~/
    

    How to attach to existing container

     ~/ docker attach ms-azure-cli
    bash-5.0# az --version
    azure-cli                         2.19.1
    

    You can detach from the container without stopping the container by using a keyboard shortcut, much like you would to unfocus your mouse from a virtual machine terminal applicaiton. Pressing Ctrl-P + Ctrl-Q will detach from the container, I had to also press Ctrl-C to completely return to my shell, not sure why this is the case.

    If you just want to execute a simple command inside a running container exec is the Docker command you want to use

     ~/ docker exec ms-azure-cli az --version
    
    Please let us know how we are doing: https://aka.ms/azureclihats
    and let us know if you're interested in trying out our newest features: https://aka.ms/CLIUXstudy
    azure-cli                         2.19.1
    
    core                              2.19.1
    telemetry                          1.0.6
    

    Troubleshooting

    Connect to FQDN

    If you encounter warnings like the following, connect using the FQDN of certificate you set Docker to use, instead of the IP address, which you might have been using during a concept plaintext setup.

     ~/ docker image list
    error during connect: Get https://192.168.0.10:2376/v1.24/images/json: x509: cannot validate certificate for 192.168.0.10 because it doesn't contain any IP SANs
     ~/ export DOCKER_HOST="tcp://phong.cormier.local:2376"                            
     ~/ docker image list
    

    Restart Server Daemon

    I changed the certificate and ran in into an issue that error of incompatible key usage kept my docker client from connecting. Even though the API seemed to be offering up the correct certificate, verifying with the command openssl s_client.

    error during connect: Get https://phong.hq.cormier.co:2376/v1.24/events: x509: certificate specifies an incompatible key usage
    

    After restarging the server docker daemon, I will able to connect successfully.

    Conclusion

    This setup gets you a quick, although not the cheapest solution for Linux Docker containers.

    Filed in: Docker, Linux, Storage, Certificates
    Reading Time: 6 minute(s)

    Rescue Your Data from EcryptFS

    Until you have a hardware malfunction and need to restore that data to another machine. I had the privilege of setting up a shiny new Ubuntu installation on a new hard drive, with my data trapped inside an ecryptfs file on another drive, which wasn’t a reliable drive, so I had to get as much of my data off soon. Ugh, what am I to do? The only thing I could do, find out how to decrypt and mount my old home directory.

    The first piece of information you are going to need is your ecryptfs mount pass-phrase, which you can recover, if you don’t remember. Here is how I recovered my pass-phrase. Notice, I have the partition with the encrypted directory mount at /mnt.

    $ sudo ecryptfs-unwrap-passphrase /mnt/home/.ecryptfs/jonathan/.ecryptfs/wrapped-passphrase
    Passphrase: Login Password
    2290da56f373d4807dac2bf0da52d09e
    

    Now that I had the mount pass-phase, I needed to add it to the keyring.

    $ sudo ecryptfs-add-passphrase --fnek
    Passphrase: Passphrase from ecryptfs-unwrap-passphrase command
    Inserted auth tok with sig [ae0722789dbed358] into the user session keyring
    Inserted auth tok with sig [c0c6192a76fb1fdc] into the user session keyring
    

    I included the –fnek switch because my setup used filename encryption. Take note of the second signature, you will use it when mounting the protected directory.

    $ sudo mount -t ecryptfs /mnt/home/.ecryptfs/jonathan/.Private/ /secret
    Passphrase: Passphrase from ecryptfs-unwrap-passphrase command
    Select cipher:
     1) aes: blocksize = 16; min keysize = 16; max keysize = 32 (not loaded)
     2) blowfish: blocksize = 16; min keysize = 16; max keysize = 56 (not loaded)
     3) des3_ede: blocksize = 8; min keysize = 24; max keysize = 24 (not loaded)
     4) twofish: blocksize = 16; min keysize = 16; max keysize = 32 (not loaded)
     5) cast6: blocksize = 16; min keysize = 16; max keysize = 32 (not loaded)
     6) cast5: blocksize = 8; min keysize = 5; max keysize = 16 (not loaded)
    Selection [aes]:
    Select key bytes:
     1) 16
     2) 32
     3) 24
    Selection [16]:
    Enable plaintext passthrough (y/n) [n]: n
    Enable filename encryption (y/n) [n]: y
    Filename Encryption Key (FNEK) Signature [ae0722789dbed358]: c0c6192a76fb1fdc
    Attempting to mount with the following options:
      ecryptfs_unlink_sigs
      ecryptfs_fnek_sig=c0c6192a76fb1fdc
      ecryptfs_key_bytes=16
      ecryptfs_cipher=aes
      ecryptfs_sig=ae0722789dbed358
    WARNING: Based on the contents of [/root/.ecryptfs/sig-cache.txt],
    it looks like you have never mounted with this key
    before. This could mean that you have typed your
    passphrase wrong.
    
    Would you like to proceed with the mount (yes/no)? : yes
    Would you like to append sig [ae0722789dbed358] to [/root/.ecryptfs/sig-cache.txt] in order to avoid this warning in the future (yes/no)? : yes
    Successfully appended new sig to user sig cache file
    Mounted eCryptfs
    

    You should be able to rescue your data, like I did. Thanks for reading, I hope you are successful as I was in retrieving your data. I will update this post with a shell script to do most of the work for you, when I get a chance to write it.

    Enjoy.

    Filed in: Linux
    Reading Time: 3 minute(s)